
Giant (Old School) Beaded Bracelet
Psssst… this post *might* contain affiliate links: see my disclosure here.
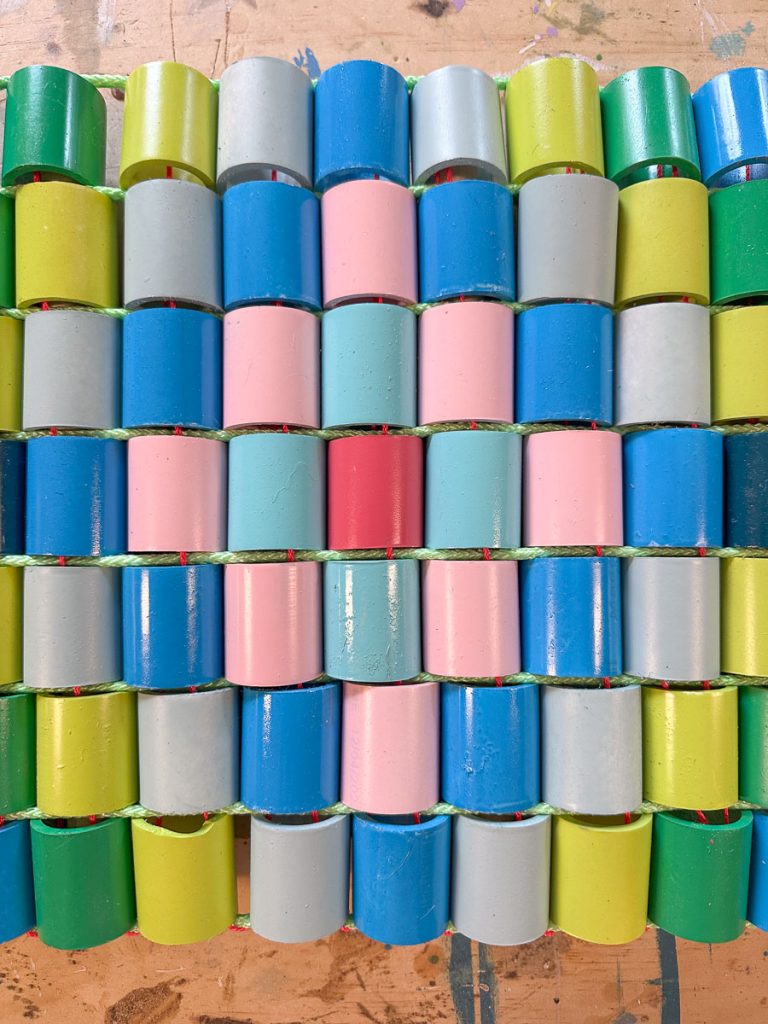
I made this giant woven beaded bracelet with spray painted pieces of PVC pipe!

Story time: I was visiting my friend Brian- who also happens to be a fabulous interior designer- and we were sitting in his new playroom for his daughter, Clover. Brian loves a gallery wall more than anyone I know so when he was doing the playroom, he asked for contributions from students and children to help. Do you see that little beaded bracelet that someone made from pony beads? It brought me RIGHT back to my childhood making these woven beaded bracelets on a loom and working row by row to make these. Why not do the same thing, but… super size it?!

Step 1. Wipe Down the PVC
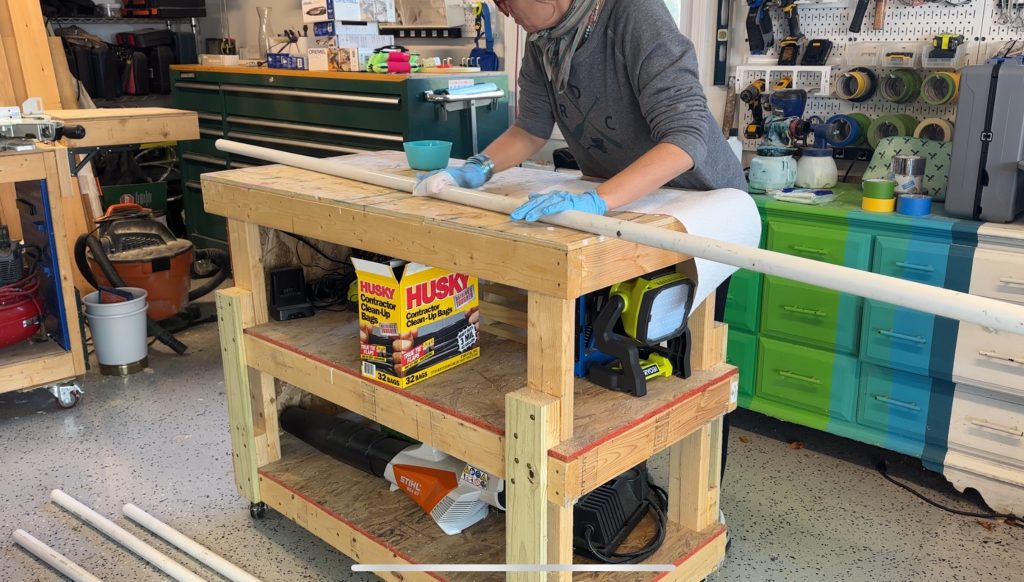
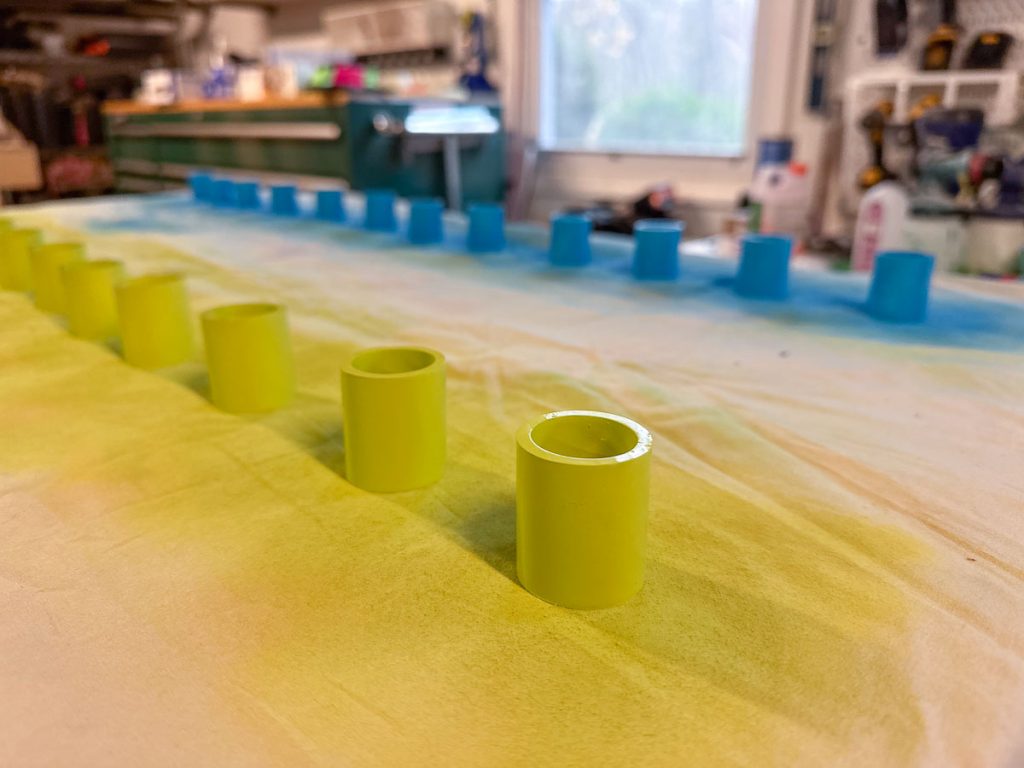
Obviously I wanted my ‘beads’ to be colorful so I needed to spray paint them. I’ve learned the hard way that in order to spray paint PVC pipes, you need to wipe them down first with acetone. I had 4 1-inch PVC pipes and wiped them down first before cutting them into smaller pieces.
Shop my favorites!
Step 2. Cut the PVC Pipe
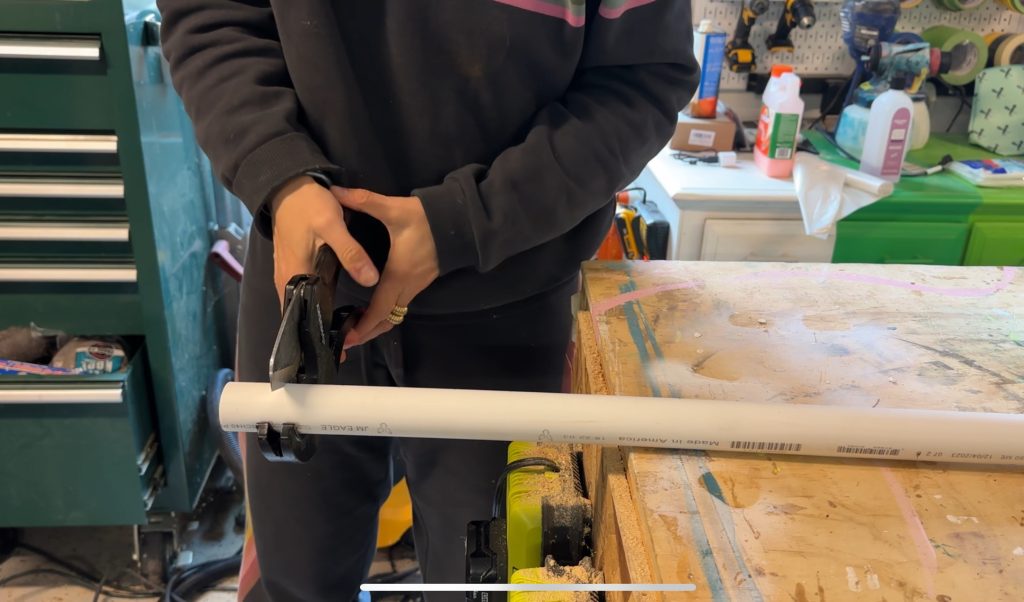
I’ve used a miter saw to cut PVC pipe before and you certainly *can* but… for smaller sections like this, it can be dangerous. There’s also SO much plastic dust which is just annoying so I far prefer to use a handheld PVC cutter like this one. For a project like this, no question it was hard on my hands because I had to make so many cuts, but I spread it out over a few days and ended up getting through it. I cut each ‘bead’ 1.5-inches long.
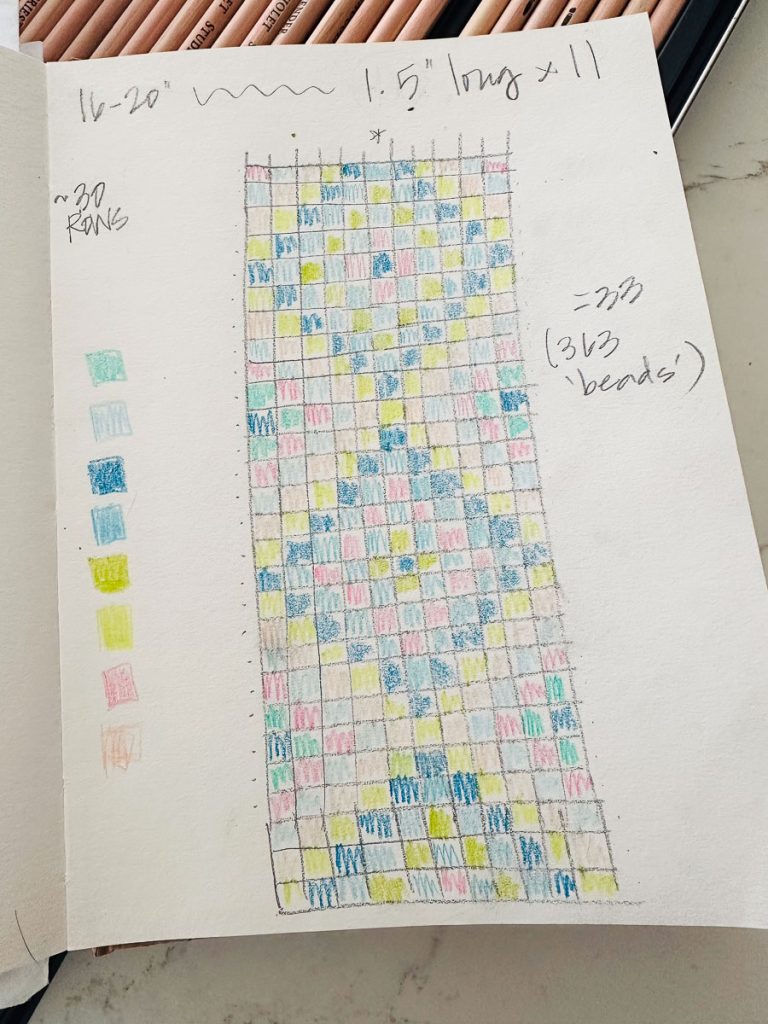
Step 3. Map Out Your Pattern
Before spray painting, map out your pattern just so you have a sense of how many ‘beads’ you need for each color. I set up little spray stations all around the garage using tarps and boxes and trash cans. It took a couple of days to get through the painting because each piece had to dry before I could pick it up and move onto the next.
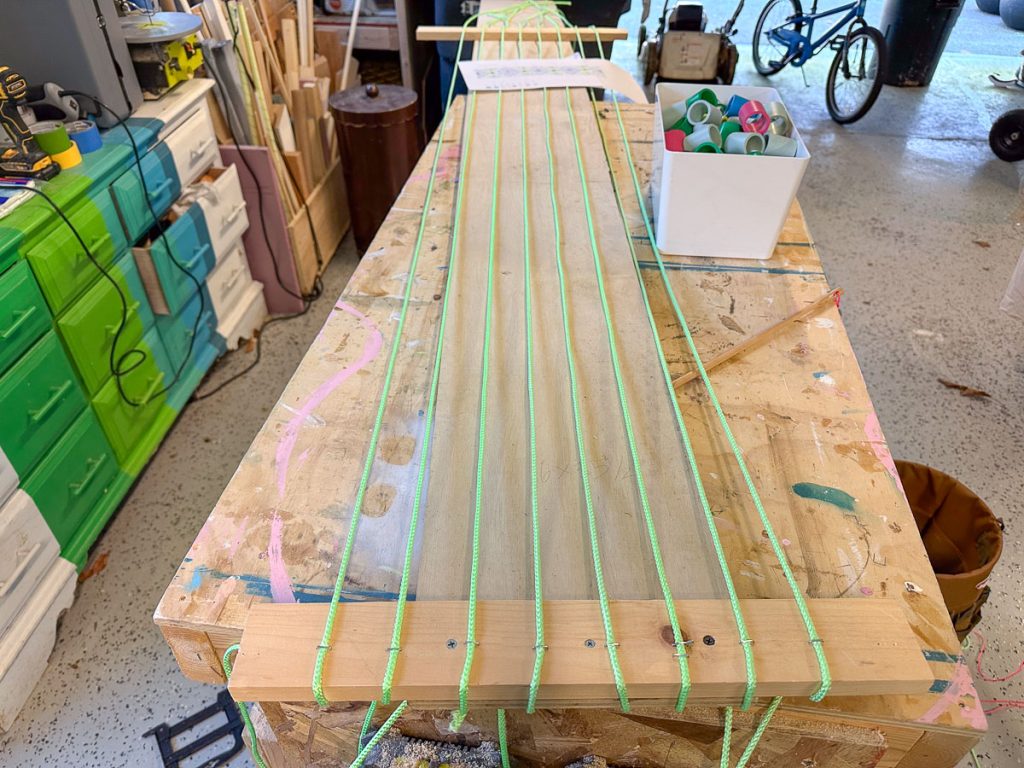
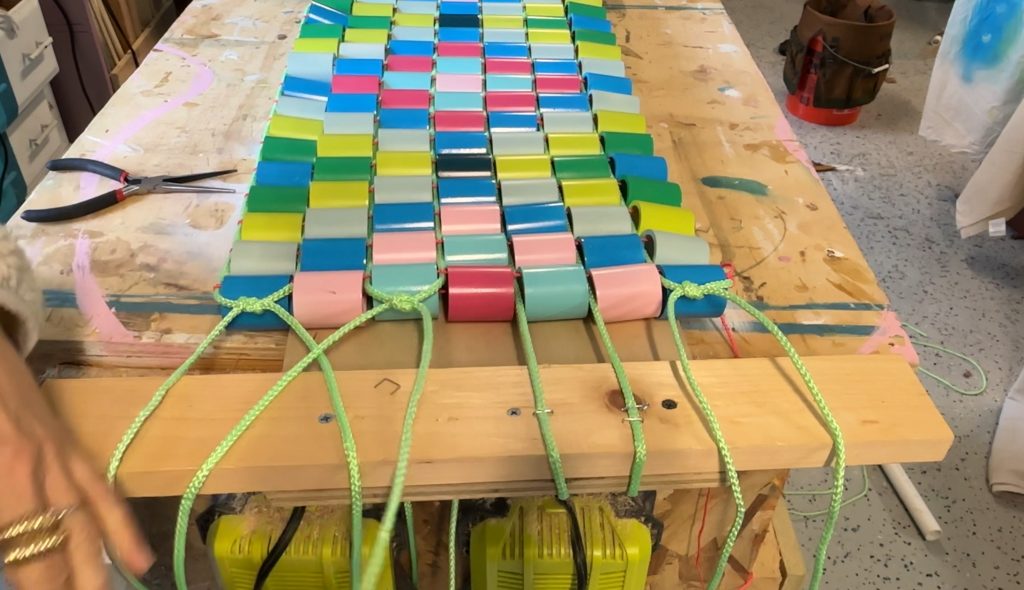
Step 4. Make the Loom
These beaded bracelets require a loom. I used some old plywood and a couple of pieces of scrap wood to make the base of my loom and then stapled that green nylon cording in place for the actual weaving.
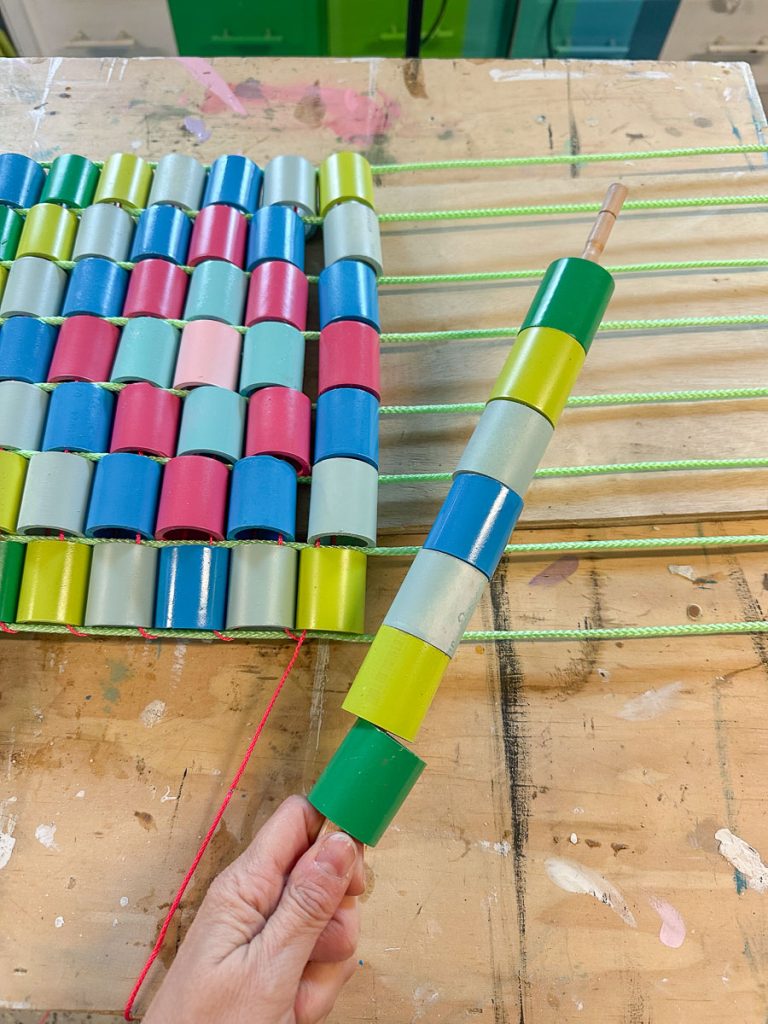
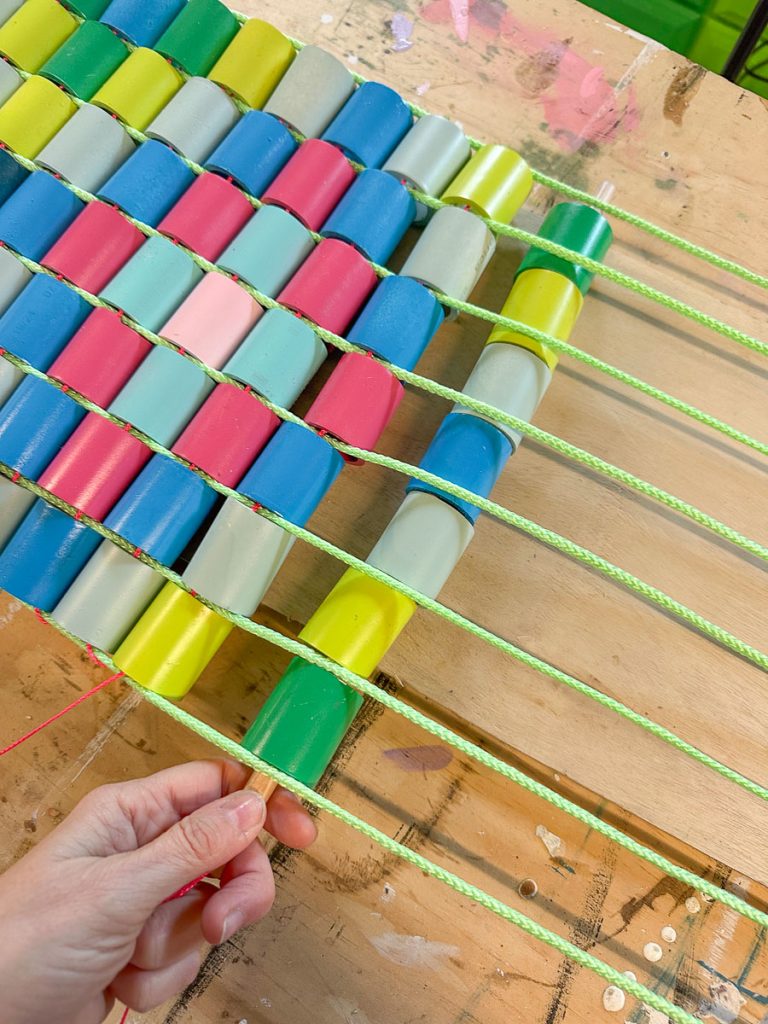
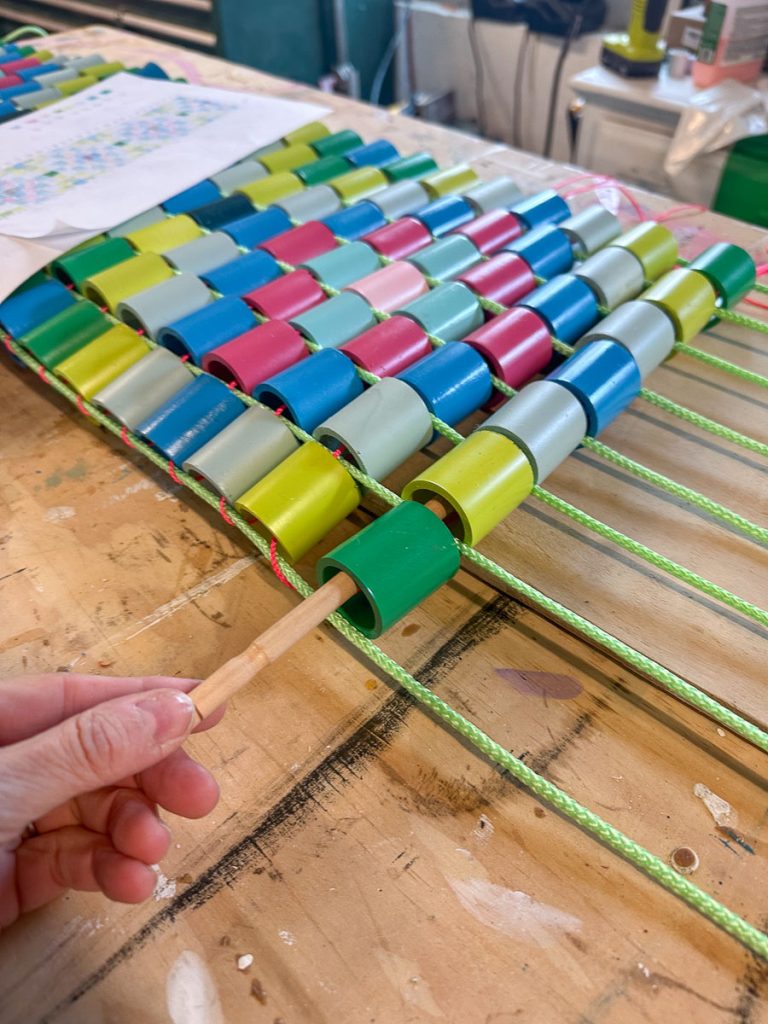
Step 5. Begin Weaving
For my “needle” I’m using a stick that I think is meant for cleaning my daughter’s flute. Assuming you don’t have something like that kicking around, I was planning on using a down with an eye hook screwed into the top. I tied a piece of pink cording to the green loom rope and started weaving. Start by loading your needle with the first pattern of beads. Bring this UNDER the loom ropes and makes sure one bead is between each rope and then bring the needle back through the beads but OVER the loom ropes. Repeat one row at a time with each pattern of beads and watch your design come into focus.
Step 6. Tie Off the Loom Ropes
Knot off each pair of loom ropes (two ropes per knot). Then tie one more knot with the new pairs of loom ropes (four ropes per knot). Repeat on the other end. Make sure that your ‘beads’ are pulled as tight together as possible… they will naturally want to sag a bit with gravity once you hold them up vertical.
Step 7. Finishing Touches
I used a wooden dowel to hang the bracelet but decided to cut up the excess dowel to help keep the rows of beads better aligned. I slid one dowel into every 3rd of 4th row of beads.
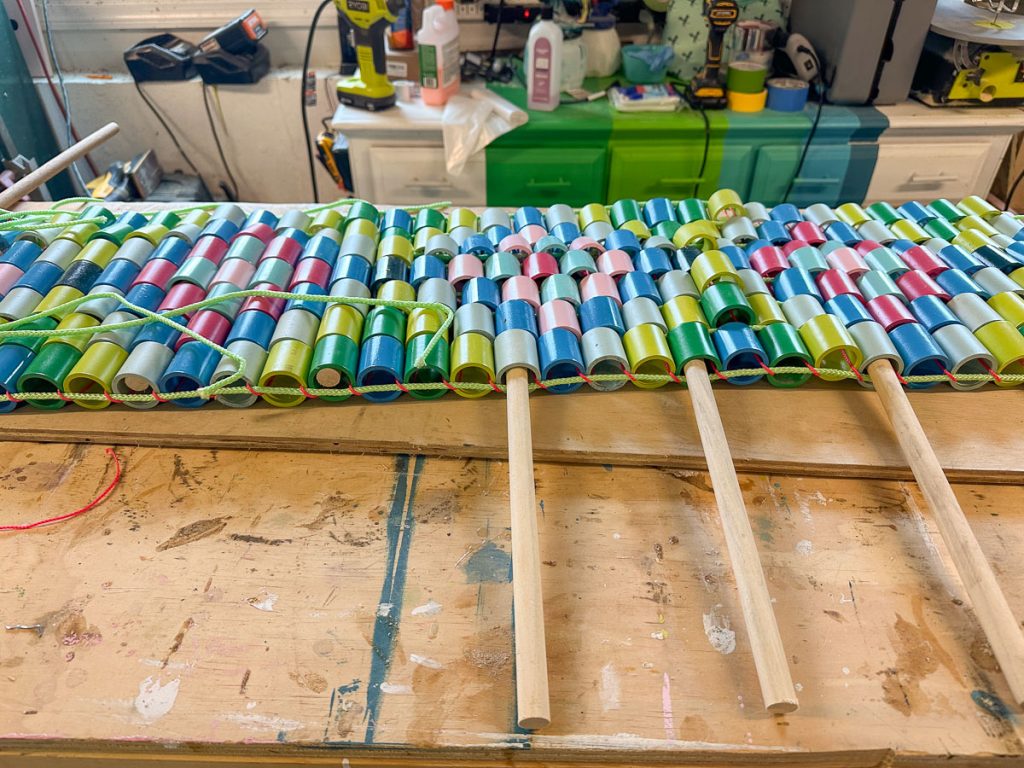
To hang the bracelet, I just used a length of rope looped on the dowels and then hooked onto picture hangers.
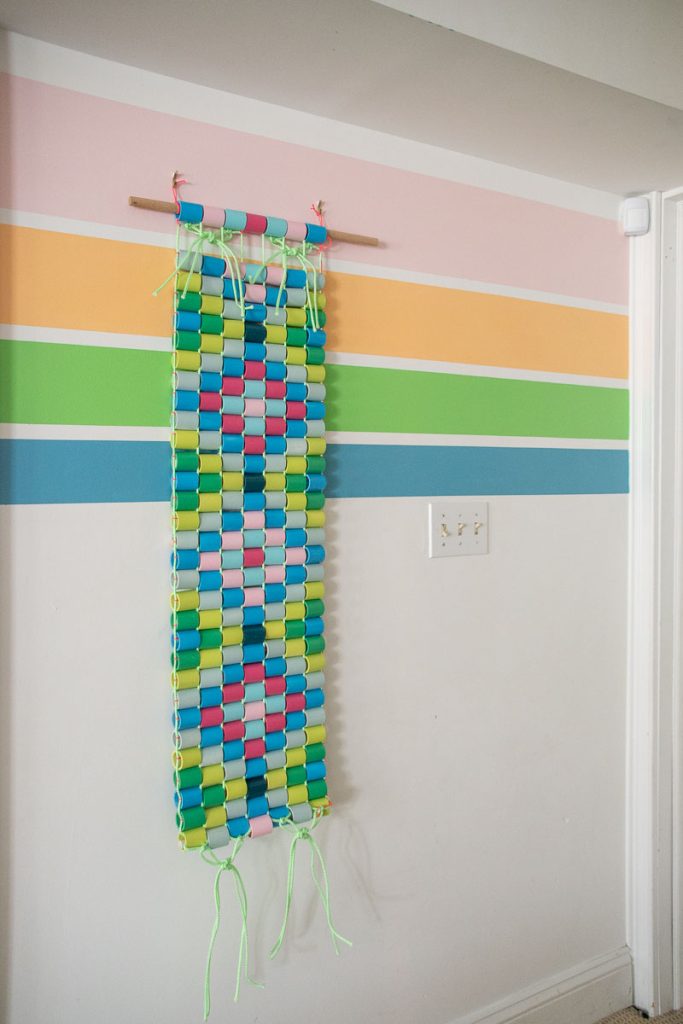
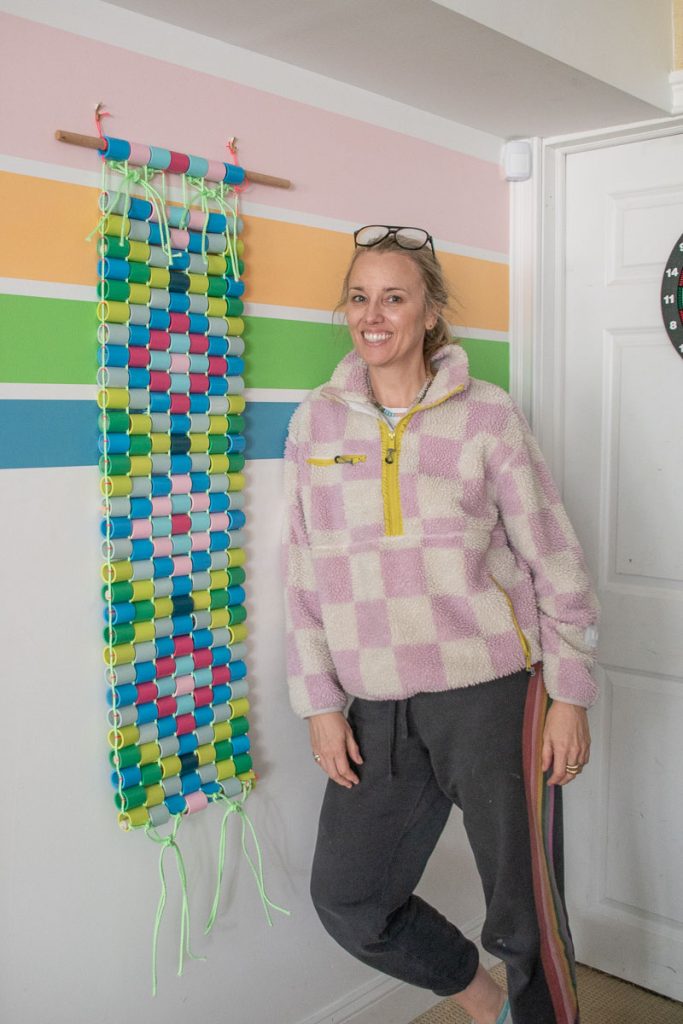
I decided to leave the ropes loose just like a real beaded bracelet might be and I love how it looks hanging in our colorful playroom. When I hung it up, I had to move the beads into place a bit since they naturally fell down and out of order slightly, but once they were shifted into place, they stayed put!


Don’t Miss Out
Become An Insider!
Signup for exclusive tips, and tricks from Charlotte’s House!
Let’s chat!
I love comments from you, so feel free to leave your thoughts and ideas below! And don’t forget to follow me on Instagram for even more!